Processes stuck at Queued

Processes stuck at Queued

There are a number of reasons why a process might be stuck at queued. The most obvious is that the process scheduler is down (check the Servers tab in the process monitor). Beyond this, there are some useful troubleshooting that apply:
Check the following tables:
  • PSPRCSRQST
  • PSPRCSQUE
  • PSPRCSPARMS
The row count should be the same in both tables. If one is out of sync with the other, then it can help to remove orphaned instances in of the tables. Restarting the process scheduler and clearing the process scheduler cache will also fix a number of issues.

Run status

In the PeopleTools 8.4x look at the translates on the field RUNSTATUS or use the query.
select FIELDVALUE, XLATLONGNAME 
from PSXLATITEM 
where FIELDNAME = 'RUNSTATUS'
Here's a summary of the run status translates (from PeopleTools 8.49). Note that not all of these are active.
ValueStatus
1Cancel
2Delete
3Error
4Hold
5Queued
6Initiated
7Processing
8Cancelled
9Success
10Not Successful
11Posted
12Unable to Post
13resend
14Posting
15Content Generated
16Pending
17Success with Warning
18Blocked
19Restart
The following query will give you a summary of the process run statuses in your process request table:
select     
    RUNSTATUS,
    (
        select  XLATSHORTNAME
        from    PSXLATITEM
        where   FIELDNAME = 'RUNSTATUS'
        and     FIELDVALUE = RUNSTATUS
    ) as RUNSTATUS_DESCR,
    count(PRCSINSTANCE)
from  
    PSPRCSRQST
group by 
    RUNSTATUS
order by 
    RUNSTATUS;

Suppressing files from the Report Repository

I once wrote an application engine to extract photographs from the PeopleSoft database (BLOBs) and to put the photos into a common location on the application server. This was an application engine program. However, the only problem was that the photos being outputted (in .jpg format) were also going to the report repository. This was a hard one to pick up as the .JPG extension had never been configured in the Process Scheduler system settings under distribution file options.
PeopleTools > Process Scheduler > Process Scheduler > System Settings > Distribution File Options
This meant that to the end user, the links were never created to the files on the report repository but they were indeed going there. It was only when the application engine batch processed a lot of photos and the report repository came to a grinding halt that this became apparent.
The fix required suppresing output to the report repository. Here's how:
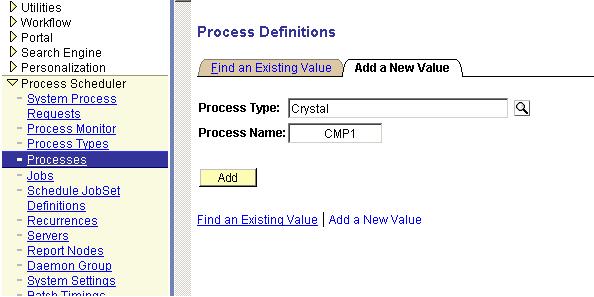
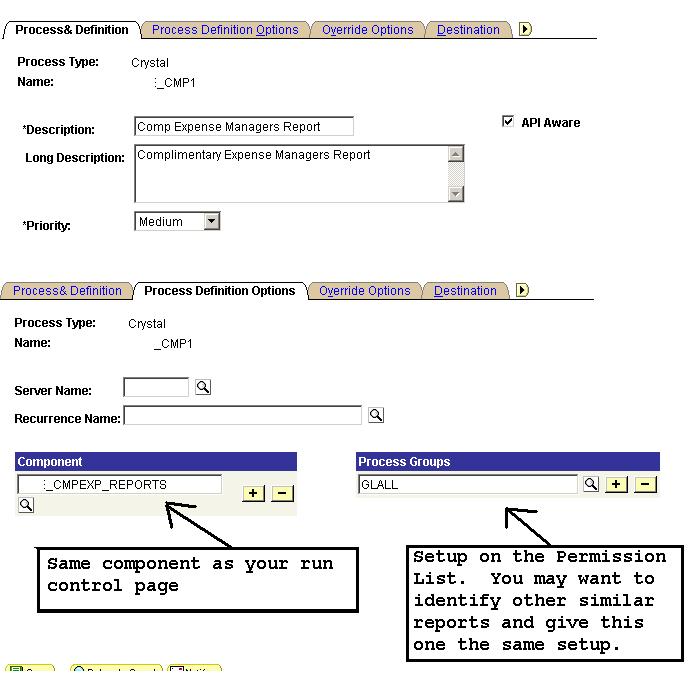
PeopleTools > Process Scheduler > Processes > [Your Process Name] > Destination
On the destination page, change the output destination options from the default to:
  • Type = File
  • Format = Other (or select appropriate file format if available)
  • Destination Source = User Specified
Not sure if the destination source has any impact. User specified is apparently the default (PeopleSoft Process Scheduler PeopleBooks) and means that the output destination is determined by the process run control designation. SQRs apparently must use this as their setting and I believe any application engine programs that output files.

Application Engine programs only stuck at queued

You may find that only application engine programs are stuck at queued while other processes (SQRs, crystals etc) run to success. This typically happens due to processes blocking the process scheduler queue. Check the process scheduler/master process scheduler logs. You might see something like this:
   Checking Process cancels...                          
(NET.113): Client ChkAeStatus3 service request succeeded
   Process 2319373 is still running as Session ID 19955 
(NET.113): Client ChkAeStatus1 service request succeeded
   Process 2319395 is still running as Session ID 19946 
(NET.113): Client ChkAeStatus2 service request succeeded
   Process 2319404 is still running as Session ID 19950 
                Application Engine       :           3:3
     Requests found in Process Request table         3
This indicates that the three process instances, 2319373, 2319395 and 2319404 are all running. As there is a maximum of 3 application engine programs that can run at any one time and there are currently 3 running, all other application engine programs requested will remained at queued. However, the three process instances may not actually be running. If this is the case, these will need to be manually stopped, for example with a process scheduler restart and perhaps by manually killing the processes on the process scheduler server if required.

Active Processes

Ever wondered where the active processes value on the server list tab comes from? Well it actually uses a view - PS_PMN_PRCSACTV_VW. This view uses the underlying records PS_SERVERMONITOR and PS_SERVERCLASS. It is the ITEMCOUNT field from PS_SERVERMONITOR that gives you the activeprocesses count by process type (SQR, COBOL, Application engine etc).

Summary of requested processes by process status

The following query will give you a summary of the requested processes by process status.
select
    RQST.RUNSTATUS,
    RQST.PRCSTYPE,
    (
        select XLAT.XLATLONGNAME
        from PSXLATITEM XLAT
        where XLAT.EFFDT = (
            select max(XLAT_ED.EFFDT)
            from PSXLATITEM XLAT_ED
            where XLAT_ED.FIELDNAME = XLAT.FIELDNAME
            and XLAT_ED.FIELDVALUE = XLAT.FIELDVALUE
        ) and XLAT.FIELDNAME = 'RUNSTATUS'
        and XLAT.FIELDVALUE = RQST.RUNSTATUS
    ) as RUNSTATUS_XLAT,
    count(RQST.PRCSINSTANCE) as TOTAL_PROCESSES,
    min(RUNDTTM) as FIRST_OCCURRED,
    max(RUNDTTM) as LAST_OCCURRED
from PSPRCSRQST RQST
group by RQST.RUNSTATUS, RQST.PRCSTYPE
order by RUNSTATUS_XLAT, RQST.PRCSTYPE

Distribution

The following tables store information about the distribution of process scheduler output to users or roles.
PS_PRCSDEFNCNTDIST
Distribution settings for process definitions.
PS_PRCSJOBCNTDIST
Distribution settings for jobs.
PS_PRCSRQSTDIST
Distribution settings by process instance. Join to PS_CDM_FILE_LIST on the process instance to get the file names.
PS_PRCSRUNCNTLDIST
Distribution by operator ID and run control.

How to create a PeopleSoft Popup menu?

First up a popup menu needs to be created. Next comes providing the page control for user which when clicked upon will pop up this menu.

Part A - Creation of a Popup menu:
1) To create a new Popup menu in PeopleSoft, create a New menu definition. When the Application designer prompts to chose the menu type, click 'Popup' Menu.

2) Double click this new menu(over the dotted rectangle) and add a new menu item and provide a label.


3) Chose the Type as 'Transfer' and click upon 'Define Transfer' button. Then provide the menu information in the below screen which must be popped up for a user.
 
If 'PeopleCode' is chosen make sure to write peoplecode in this popup menu. Right click the menu and chose 'View PeopleCode' option from the popup menu to navigate to the ItemSelected event. Here right your peoplecode to transfer to the required component. 

4) If there are more number of menus that need to be listed in the popup menu then add the required number of menu items and define the corresponding transfers.

5) Finally save the menu. 

Part B - Providing a page control for Popup Menu:
1) Chose the Page field which must be associated with the Popup menu

2) In the 'Use' tab of the page field properties, select this new menu from the Popup Menu drop down list as shown below:


3) Make sure that this page field will have a value otherwise, the popup menu icon does not get displayed. 

4) Save the page and test by clicking upon the arrow button displayed along side the Page field associated for the popup menu.

Note: There are two Popup menu icons; the icon displayed varies based upon whether only one component or multiple components is/are associated with the menu.

How to change default SETIDs for a Business Unit?

First up, how to associate a SETID with a Business Unit in PeopleSoft?
It's a one time activity done while creating a Business Unit. However SETIDs cannot be changed as easily as one would think after the creation of a Business Unit

Business Units(BU) are created and maintained in the navigation: Set Up HRMS -> Foundation Tables -> Organization -> Business Unit

In this BU page, under 'Default Record Group Setids' either a new SETID can be entered or SETIDs setup can be cloned from an existing Business Unit.


Until an option is chosen, only one field is editable and other is disabled. If the cursor is positioned to 'SETID' then 'Clone from Existing Business Unit' is disabled and vice-versa. 
Once an option is chosen and saved, both the options get grayed out and one cannot modify this default SETID. So how to change the SETIDs once a Business Unit is setup and associated with a different SETID?

There are two ways to change the SETIDs for a Business Unit:
1) Conventional - PIA method:
Navigate to PeopleTools -> Utilities -> Administration -> TableSet Control 
Type in the setcontrol value in the search page. 
Change the default setid to a required new SETID. Doing this would associate the new SETID for all the Record groups for that BU. If you need to change the SETID only for a few Record Groups then change the setids for each record group instead of changing the default SETID.


2) Backend(database update) method:
Default setid in the below table's has to be updated to replace the PeopleSoft delivered default setid. 
  • PS_SET_CNTRL_TBL
  • PS_SET_CNTRL_GROUP
  • PS_SET_CNTRL_REC
  • and the Record group table
Record group table can be PS_REG_REGION_TBL, PS_LOCATION_TBL, PS_DEPT_TBL and so on. If you need to change the SETID for a Region from 'ABC' to 'XYZ' then update the above three tables and PS_REG_REGION_TBL.

How to find which users have permission and do not have access to a PeopleSoft Component Interface?

How to find which users have permission and do not have access to a PeopleSoft Component Interface?
Many a times we create number of batch processes based on Component Interfaces. No matter how much carefully we try to take care of the security settings we often overlook on CI permissions. 
Here are couple of SQL queries that could assist finding the Users and Permission List having permission and not having access to a Component Interface.


For example, 'USERMAINT_SELF' - Component Interface is based on the My Profile Component. It allows only the current user to access it. This Component Interface must definitely have permission to the components like: Forgot My Password, Change Password - (CHANGE_PASSWORD component), and Change Expired Password.

To find out users already having permission to a Component interface(in this case - USERMAINT_SELF CI) the below SQL statement will be useful:
SELECT DISTINCT oprid, 
                oprclass 
FROM   psoprcls 
WHERE  oprclass IN (SELECT classid 
                    FROM   psauthbuscomp 
                    WHERE  bcname = 'USERMAINT_SELF' 
                           AND bcmethod = 'ChangePassword') 
       AND oprclass <> 'PSADMIN' ; 


To find out what users do not have access to this component interface run this statement:
SELECT DISTINCT oprid, 
                oprclass 
FROM   psoprcls 
WHERE  oprclass NOT IN (SELECT classid 
                        FROM   psauthbuscomp 
                        WHERE  bcname = 'USERMAINT_SELF' 
                               AND bcmethod = 'ChangePassword') 
       AND oprclass <> 'PSADMIN';

Changing Size of a Crystal Report to custom sizes beyond the size allowed in the local configured printer


Changing Size of a Crystal Report to custom sizes beyond the size allowed in the local configured printer

Often in Crystal Reports, the width of the page needs to be set to varying and custom sizes. By default, the sizes available for any Crystal Report is dependent upon the size of papers that can be printed in the Printers configured to that particular desktop in which Crystal Report client is installed. So it becomes challenging to set to sizes of the report to be more than the maximum size allowed in the local printer. When Microsoft Document Image(MDI) Writer is available as a Printer then we could easily spoof around this. We will see the two different approaches and the glitches associated with each of them.

To increase the width(max 36”) of a Crystal Report (using MDI Writer):
  • Select 'Page Setup' from file menu.
  • Click upon the 'Printer' button in Printer Options
  • Select 'Microsoft Office Document Image Writer' as Printer and click on the Properties tab
  • Enter the required height and width in the respective fields and click ok
  • Now change the Printer type to default type and click ok
  • The Size will now be displayed as 'Custom Size'. Now Check the 'No Printer' check box under Printer options and click ok. The option must look as mentioned in below screenshot.


  • When you open the Page Setup again you will see the standard option displayed in size however the report will behave as expected.
 
To increase the width of a Crystal Report beyond 36 inches (using an external driver):
The width of the page in design tab can be increased by installing an external printer driver PDF4U.
  • Download and install PDF4U external printer driver. Performing a google search with "PDF4U" gives a number of urls from where PDF4U.exe can be downloaded. Then do the setup as below.
  • Go to File ->Page Setup->Printer and select the PDF4u printer from the drop down.
  • Now click the properties tab -> select the radio button custom size and enter the required width and height.
  • Do not check the 'No Printer' check box under Printer options and click ok.
This way the horizontal size(width) of a Crystal report can be set to any custom size more than 36 inches. The hiccup is not many companies allow download and usage of external drivers. So having a report of size more than 36'' could still remain challenging.

How To Create a Crystal Report for PeopleSoft

In the following example, I have blocked out the first 3 characters of the name for custom objects.  If you see a name beginning with an underscore '_' or a blank space then you should know to add your own identifier for that custom object.

First, create a PeopleSoft Query as shown:


Any prompts the user must enter for criteria are set in the query. The Run Control page you create collects those prompt values from the user. So, act like you are creating a query for the end user and not a Crystal. All the Crystal does is acts as a nice dressing for a query plus it can do some advance formulas that you may not be able to accomplish with the query alone. But think of the query doing all the work and Crystal taking all the credit.

So, create your query with the necessary prompts and save it.

Next, you will open Crystal and select FILE > NEW and select radio button for “As Blank Report” from the following popup window and click OK:

  
Next in the Data Explorer window that should popup, select your PeopleTools ODBC via a double click: 

And then you should get the familiar 2-tier login:


You should now be able to see queries under your PeopleTools ODBC, if not…select the OPTIONS button on your Data Explorer screen and make sure Stored Procedures is checked. Click ok, and then close/reopen your PeopleTools ODBC. Select your query and click ok. After this just drag and drop the fields you need for the report. Save the Crystal on the application server \CRW\ENG or \CRW folder with an 8 character length name. NOTE: YOU DO NOT NEED TO CREATE PROMPTS IN CRYSTAL. THE PEOPLESOFT QUERY DOES ALL THE WORK.


Next, create your run control record for storing data and a run control page for collecting data as you would with an Application Engine or for an SQR.

Now, if you have an existing Crystal report that was created to hit the database directly (used outside of PeopleSoft), and you need to add it to PeopleSoft…do the following.
  1. Examine the way the Crystal is querying the database by selecting within the Crystal Report DATABASE > SHOW SQL QUERY 
  2. Create a PeopleSoft Query based on the Crystal’s SQL query and add the prompt values that the Crystal may be asking and replicate that functionality on the PeopleSoft Query. You “may” have to remove the prompting from the Crystal itself.
Now, you will need to point the Crystal to the new PeopleSoft Query through the PeopleTools ODBC by selecting DATABASE > SET LOCATION > SET LOCATION (button). 

Once connected via the PeopleTools ODBC, use the Data Explorer to find and select your new query. The Crystal may ask to do an update of the report and go so far as to ask you to map existing fields in the Crystal Report to those in the query. This is mostly GUI and requires so coding.

Now, I will focus on setting up Crystal so it is accessible 4-tier (web browser) and assume your run control page and component are already setup and accessible 4-tier.

Now, navigate PEOPLETOOLS > PROCESS MONITOR > PROCESSES and select the Add New Value tab. Select Crystal Report and enter the 8 character report name as seen below:


Once you click add, you need only worry about the first 3 tabs: “Process & Definitions” (descriptions), “Process Definition Options” (security), and “Override Options” (passing query parameters).

Examples:


This last example is where the query parameters are passed.
 

In this example the appended line is as follows:

-ORIENTL :_run_cmpfrms.date_sel_dt :_run_cmpfrms.date_sel_dt2 :_run_cmpfrms.deptid
:_run_cmpfrms.supervisor_id :_run_cmpfrms.emplid :_run_cmpfrms.location

The portion “-ORIENTL” means orient for landscape. “-ORIENTP” would be for portrait. The rest of the line is in the format “space” and “:” and “no space” and “record.field” until all parameters are in the line. NOTE: THE PARAMETERS ENTERED IN THIS LINE MUST BE IN THE SAME ORDER THE QUERY PROMPTS APPEAR WHEN YOU RUN THE QUERY.

Save this process definition and you should be good to go. You can add a process definition to a project via application designer and migrate it to another environment.

How to Configure the Crystal Reports in PeopleSoft?

How to Configure the  Crystal Reports in PeopleSoft?
Configuration of Crystal Reports in PeopleSoft:

From PeopleSoft PIA environment in which Crystal Reports need to be configured, access 'Configure' content reference through the below navigation:
PeopleTools -> Query Access Services -> Configure

In this content reference you will find two tabs(Pages) - 'Query Access Services' and 'Business Objects Enterprise'.

Query Access Services Page:
In the first page - 'Query Access Services' under 'Query Access Services Integration Gateway URL' and  'Query Access Services Result Repository URL' provide fields to enter QAS URL and URL respectively. 

Query Access Services Integration Gateway URL:
The QAS URL provided in 'Query Access Services Integration Gateway URL' is used by external applications to interface the PeopleSoft Query Access Services (QAS). While creating a Crystal Report use this QAS URL as PeopleSoft Enterprise connection to connect to the PeopleSoft Query access services. Once a connection is established to the QAS URL through Crystal Reports, we can use the underlying PS-Queries created in PeopleSoft. Generally QAS URL are as below: 
http:// machinename:port# followed by:/PSIGW/Query/ListeningConnector 

This URL is derived from the local Integration Gateway URL and can be edited. If abcd is the machine name and 1234 is the portname then the QAS URL is http://abcd:1234/PSIGW/Query/ListeningConnector. The QAS URL is potentially the same as PeopleSoft PIA url used to login to the same machine name and the change in URL is only after the portname and is suffixed with PSIGW/Query/ListeningConnector.

Query Access Services Result Repository URL:
The URL provided in 'Query Access Services Result Repository URL' is where the results of PeopleSoft query are saved. The machinename is same as the Gateway URL entered above. Generally URL is as below: 
http:// machinename:port# followed by :/PSIGW/QASRepositoryWriter

Here we can specify the maximum size for the query results to be fetched in units of Megabytes.

BusinessObjects Enterprise page:
In this page, there are three sections explained below.

BusinessObjects Enterprise:
There are two editable userid and two editable password fields.

  1. Enter the 'Administrative user' which is typically the BO Admin userid with its password.
  2. Enter the 'Viewing User' and the corresponding password.
BusinessObjects Web Server: 
Enter the BO Web server URL here. This is the location of the Business Objects Enterprise (BOE) web server. All that's needed to be entered here is http:// followed by the machinename:port#

BusinessObjects Database:
This is the location of the BusinessObjects Enterprise(BOE) - Central Management Server (CMS) database. There are two editable fields here:
  • CMS Machine Name - enter machinename:port# in this field. This can be same as the BO Webserver machine name.
  • BOE Domain Name - enter the domain name however this is an optional field

Phani's Peoplesoft: PeopleSoft Payroll for North America - Payroll steps

PeopleSoft Payroll for North America - Payroll steps

Brief idea on PeopleSoft North American Payroll

Payroll for North America provides the tools to calculate Earnings, Taxes and Deductions, maintain balances and report Payroll data. It also provides you, how you want to group the workforce, when you want to pay them.

Payroll system enables you to calculate gross-to-net pay, Leave accruals, retroactive pay, and direct deposits.


PeopleSoft Payroll consists of below steps.

·         Setting up Foundation Tables (HR, Payroll)
·         Setting up Employees
·         Paysheet Creation
·         Pay Calculation
·         Pay Confirmation
·         Post to General Ledger, Pay Taxes, Pay Third Parties, Produce Reports


To Use PeopleSoft Payroll for North America we need set up the following components in PeopleSoft Human Resources:

HR Tables:

Installation Table
SETID Table
Business Unit
Company Table
Location Table
Department Table
Job Code Table

Payroll Process Tables:

The primary function of the payroll process tables is to allow to group employees together for payroll processing and to define how earnings are calculated. These tables will help to organize how a payroll will be processed

Form Table
Bank Table
Source bank Table
Paygroup Table
Special Accumulator Table
Earnings Table
Earnings Program Table
Shift Table
Deduction Subset Table
Deduction table
General Deduction Table
Company General Deduction Table
Federal/State Tax Tables
Local Tax Tables
Tax Location
Company State/Local Tax Table
Garnishments

Payroll Processing flow:

Payroll Process flowGood Explanation on PeopleSoft North American Payroll